This post was recently made on AcrobatUsers.com.
I am using Adobe Acrobat XI, and need to center a picture horizontally on a page. How can I do this?
At first I thought, this can’t be too hard, especially with the new editing tools in Acrobat XI. Then, after I tried it, I realized that although it isn’t hard, it’s not intuitive either because Acrobat doesn’t have the bells and whistles of other layout tools like InDesign.
To start I just created a new blank page from the More Insert Options under the Pages panel. Next, turn on the Rulers, Guides, and Snap to Grid (but not the actual Grid) under View > Show/Hide Rulers & Grids.

Next, drag a guide to the center of the page by clicking in the ruler area on the left and holding down the mouse. Do the same thing from the top ruler. You can determine the center point from page size that is displayed in the lower left corner. If this is not displaying, you can turn it on in the preferences under Edit > Preferences > Page Display “Always show document page size”.
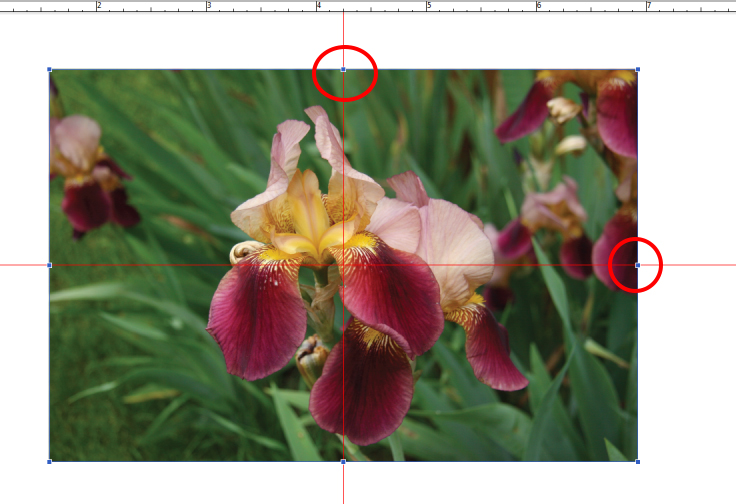
 Use the Add Image command from under the Content Editing panel to place the image and activate edit mode. When edit mode is active the image will have selection boxes at the corners and center points. You can use theses selection boxes to center the image.
If you would like to learn more about editing techniques in Acrobat XI check out my session on Editing Graphics in a PDF File in Learn Acrobat XI on Udemy.com.

Hi Lori,
Acrobat always paste at the center of the screen, so when the Acrobat window is full screen and when the PDF fit the window, you just have to cut and paste to center any object.
😉
Hi JR – Great suggestion if you’re using the cut/paste command instead of the Add Image command. No fussing.
Lori