This comment came up recently on one of the editing tutorials on AcrobatUsers.com.
I am new to Adobe Acrobat XI Pro for Students and Teachers and am attending a medical transcription course online. I downloaded my lessons to Acrobat, but when I convert them to Word for typing out my written answers and quizzes, the format is all messed up. How do I get them to stay in the same format as the class requirements.
My first reaction was to point out that there is a setting in the Word export from Acrobat that can correct this. Then, I thought, why are they going through the hassle of converting to Word when you can add the text in both Acrobat and Adobe Reader XI? Then I realized that these particular PDF files must not have any form fields on them, so it isn’t obvious at all how to add text to them. In fact, the handy little tools for adding text to PDF files aren’t even located in the Tools pane.
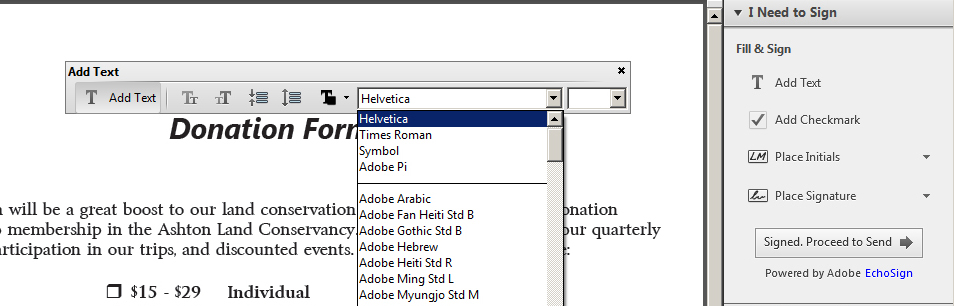
Instead, you’ll find the Add Text commands either under the Sign pane > I Need to Sign panel or the Annotations panel under the Comment pane. These tools are available in both Acrobat and the free Reader (but only Reader XI) . The Add Text command under the I Need to Sign panel is the same as the Add Text Comment in the Annotations panel. I won’t be discussing the Add Text command found under the Content Editing panel because it acts completely different and is not found in the free Reader (which many students use). Also, for all those students that use an iPad, there is an Add Text tool in the Mobile Reader for iOS and Android but you access it a bit differently.
I like to use the commands found under the Sign pane because they have convenient tools for adding text and checkmarks, which are great for quizzes and forms. When you select the Add Text command, the I-beam alignment cursor helps you precisely control the placement of the new text on the page, and you’ll see a floating properties toolbar appear. In the toolbar you can apply limited formatting somewhat like a typewriter – you can change the font, font color, line spacing, but your font size choices are limited to what you see in the dropdown. If you don’t see the properties toolbar, you can always open it using the keyboard shortcut Ctrl + e (Cmd + e on the Mac).
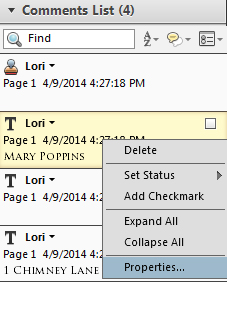
Now something special is happening when you use these particular tools. They are all added to the PDF file as an annotation, which means they’re not integrated directly into the page. Instead, comments are created each time. This means that if you flip over to the Comment Pane, you can see a running tally of them in the Comments List.

Very often I’m asked how to change the default font for the Add Text tool. Simply select the comment in the Comments List that uses the font you want, right-click, and choose Properties from the menu.
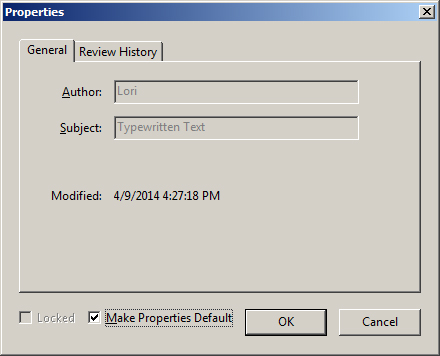
In the Properties dialog, check the box for Make Properties Default.
Also, since these are comments in the file, you can go back and edit or move them if necessary. To do this, activate the Hand tool in the toolbar and then click on the comment. Another great thing about the comments is that you can get a summary of all of them if you have Acrobat (not Reader). You do this by selecting Create Comment Summary from the Options dropdown in the Comments List panel.

I just wanted to mention that the add text tool has been around for awhile. Back in Acrobat 9, it was called the Typewriter tool. In Acrobat X, it was called the Add or Edit Text Box command. So, even though it’s moved around a bit and been renamed, you’ll find it invaluable for filling out forms that don’t have form fields, adding notes to your lectures in PDF, or completing homework or quizzes. If you would like to learn more about the commenting tools in Acrobat check out my course on Learn Acrobat XI where I cover this during the Creating Comments in a PDF File session.
